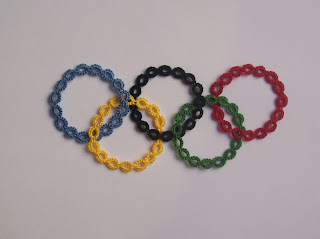
The femininity of a sundress can be embellished of precious details with a simple and delicate tatting lace.
Let us see how to make it.
Una trina a chiacchierino semplice e delicata può arricchire di dettagli preziosi la femminilità di un prendisole.
Vediamo insieme come realizzarla.
All images of this project are shown in this video.
Tutte le immagini di questo progetto sono mostrate in questo video.
All that is necessary:
Perlè nr. 8, white color;
satin ribbon 6 mm, white color;
a cardboard strip of 16 mm;
a cardboard strip of 26 mm;
two shuttles, crochet hook, beads (optional).
Cosa ci serve:
Perlè nr. 8 di colore bianco;
nastrino di raso bianco da 6 mm;
una stricia di cartoncino larga 16 mm;
una stricia di cartoncino larga 26 mm;
due navette, uncinetto, perline (facoltative).
Ring of 6ds - 1p - 6ds- 1p of 16 mm (insert the cardboard strip of 16 mm before making the picot, as shown in photo 1) - 6ds, 1p - 6ds. Close and reverse work (RW).
Chain of 4ds - 3p (make the second picot longer) - 4ds. RW.
*Ring of 6ds, join to the last p of the previous ring, 6ds - 1p of 26 mm (insert the cardboard strip of 26 mm before making the picot, as shown in photo 2) - 6ds - 1p - 6ds. Close and RW.*
Make a chain as before.
Repeat from * to *.
Make a chain as before.
Ring of 6ds, join to the last p of the previous ring, 6ds - 1p of 14 mm - 6ds - 1p - 6ds. Close and RW.
Repeat these steps for the desired length.
When you complete the first part of lace, make the second part at the same way. During the processing, join the second part to the first by central picots of each ring, remembering to cross the longer picots.
Anello di 6nd - 1p - 6nd - 1p di 16 mm (inserite la striscia di cartoncino larga 16 mm prima di fare il picot, come mostrato nella foto 1) - 6nd - 1p - 6nd. Chiudere e voltare il lavoro (Ch. e volt.)
Arco di 4nd - 3p (fate il secondo picot più lungo) - 4nd. Volt.
*Anello di 6nd, att. all'ultimo p dell'anello precedente, 6nd - 1p di 26 mm (inserite la striscia di cartoncino larga 26 mm prima di fare il picot, come mostrato nella foto 2) - 6nd - 1p - 6nd. Ch. e volt.*
Lavorate un arco come in precedenza.
Ripetete da * a *.
Lavorate un arco come in precedenza.
Anello di 6nd, att. all'ultimo p dell'anello precedente, 6nd - 1p di 16 mm - 6nd - 1p - 6nd. Ch. e volt.
Ripetete questi passaggi per la lunghezza desiderata.
Una volta completata la prima parte le pizzo, lavorate la seconda parte allo stesso modo. Durante la lavorazione, unite la seconda parte alla prima tramite i picot centrali di ciascun anello, ricordando di incrociare i picot più lunghi.


