Pagine

mercoledì 23 marzo 2016

Tatting papillon - Papillon a chiacchierino

Tatting bow tie - papillon a chiacchierino
Good afternoon everybody,
I hope the post with my tatting flowers patterns has been useful.
Today I want to show you another work easy to make and, at the same time, fun.
With the thread used for tatting silver bracelet and some fabric, I tried to make a bow tie.
To know how I made, you can watch the video in which there is both the pattern of the motif and the work phases.
How you'll see the tatting is composed by 56 motifs, after making tatting lace the most of the work is sewing.
Also you'll see it can be used as you like and it will be easy to change its size, increasing or decreasing the number of motifs.

Buon pomeriggio a tutti,
spero che i post con gli schemi dei miei fiori a chiacchierino vi siano stati utili.
Oggi voglio mostrarvi un altro lavoro facile da fare e, allo stesso tempo, divertente.
Con il filo usato per il braccialetto argentato e un po' di stroffa, ho provato a realizzare un papillon.
Per sapere come ho fatto, potete guardare il video nel quale ci sono sia lo schema del motivo, sia le fasi del lavoro.
Come potrete vedere il chiacchierino si compone di 56 motivi, dopo aver lavorato il pizzo, la maggior parte del lavoro è di cucito.
Vedrete anche che può essere utilizzato come più vi piace e sarà facile cambiarne le dimensioni, aumentando o diminuendo il numero dei motivi.

Tatting bow tie - Papillon a chiacchierino
It can be a bow tie, or...
a bow to decorate a bag or...
a decoration to hair clips or...
it will become all that your imagination suggests you.


Tatting bow - fiocco a chiacchierino
Può essete un papillon, o...
un fiocco per decorare una borsa, o...
un ornamento per un fermacapelli, o...
potrà diventare tutto ciò che la vostra creatività vi suggerisce.  

sabato 12 marzo 2016

3D Tatting flowers (part 2)

Red flower - tatting
Good morning,
today we see how to make the other two flowers which are in 3D Tatting flowers video.
In the previous post on the 9 March, we saw how to make the white flower, now you'll find pattern and instructions of red flower and ecru flower. They are processed in the same way of the first flower and I used the same materials, therefore I won't repeat these steps, if you want to read them can consult the mentioned post.

Ecru flower - tatting
Buongiorno,
oggi vediamo come ralizzare gli altri due fiori presenti nel video 3D Tatting flowers.
Nel precedente post del 9 Marzo, abbiamo visto come ottenere il fiore bianco, adesso vedremo lo schema e le istruzioni del fiore rosso e del fiore ecrù. Questi fiori sono lavorati allo stesso modo del primo ed ho utilizzato gli stessi materiali, perciò non ripeterò tali passaggi, qualora foste interessati a leggerli potete consultare il post sopracitato.

Red flower - tatting - pattern
Ring of 8ds - 1p - 8ds. Close and RW. Chain of 12ds. RW. Ring of 4ds, join to the p of the previous ring, 4ds - 2p separated by 4ds - 4ds. Close and RW. Chain of 8ds. RW. Ring of 6ds, join to the last p of the previous ring, 6ds. Close and RW. With the second shuttle make a ring of 3s (3 times the first half of ds). Close. This is a JK (Josephine Knot) indicated in the pattern with a black circle. Chain of 8ds, join to the central p of the second ring. Chain of 6ds - 1p - 6ds, join into base of the first ring. RW. Chain of 6ds - 1p - 6ds. With the second shuttle begin the first ring of the second petal. When you tat the next chain, remember to join it to the chain of the previous petal. Make seven petals in this way, then tat a chain of 5ds - 1p - 5ds and begin the first petal of the next six.
With the second shuttle make a ring of 8ds - 1p - 8ds. Close and RW. Chain of 5ds, join to the p of the previous chain, 5ds. RW. Ring of 3ds, join to the p of the previous ring, 3ds - 2p separated by 3ds - 3ds. Close and RW. Chain of 7ds. RW. Ring of 5ds, join to the last p of the previous ring, 5ds. Close and RW. With the second shuttle make a JK as before. Chain of 7ds, join to the central p of the second ring. Chain of 5ds - 1p - 5ds, join into base of the first ring. RW. Chain of 5ds - 1p - 5ds. Make in this way other five petals, then make a chain of 3ds - 1p - 3ds and begin the first petal of the last five. With the second shuttle make a ring of 6ds - 1p - 6ds. Close and RW. Chain of 4ds, join to the p of the previous chain, 4ds. RW. Ring of 2ds, join to the p of the previous ring, 2ds - 2p separated by 2ds, 2ds. Close and RW. Chain of 6ds. RW. Ring of 4ds, join to the last p of the previous ring, 4ds. Close and RW. With the second shuttle make a JK as before. Chain of 6ds, join to the central p of the second ring. Chain of 4ds - 1p - 4ds, join into base of the first ring. RW. Chain of 3ds - 1p - 3ds. Make other four petals, remember that the last chain is made of 8ds.
Red flower - tatting - pattern
Base
To complete this flower make a base as shown in this pattern and prepare the central part which is made using yellow thread and small beads of the same colour.
To make the central part we need a shuttle only. Insert 14 beads on the thread and begin making a JK, slip a bead next to JK and repeat 1JK - 1 bead - 1JK. Close into a circle joining the last JK to the first. Repeat 1JK - 1 bead - 1JK, join to the circle.
Repeat these last steps until the end of the beads. Cut and tie.
You can sew or glue this part to the flower.


AN di 8nd - 1p - 8nd. Ch. e Volt. AR di 12nd. Volt. AN di 4nd, att. al p dell'AN precedente, 4nd - 2p separati da 4nd - 4nd. Ch. e Volt. AR di 8nd. Volt. AN di 6nd, att. all'ultimo p dell'AN precedente, 6nd. Ch. e Volt. Con la seconda navetta lavorate un AN di 3n (3 volte la prima metà di un nd). Ch. Questo è un NG (Nodo Giuseppina) indicato nello schema con un cerchietto nero. AR di 8nd, att. al p centrale del secondo AN. AR di 6nd - 1p - 6nd, att. alla base del primo AN. Volt. AR di 6nd - 1p - 6nd. Con la seconda navetta iniziate il primo AN del secondo petalo. Quando lavorate l'AR successivo ricordate di att. all'AR del petalo precedente. Lavorate sette petali in questo modo, poi un AR di 5nd - 1p - 5nd e iniziate il primo petalo dei sei successivi. Con la seconda navetta fate un AN di  8nd - 1p - 8nd. Ch. e Volt. AR di 5nd, att. al p dell'AR precedente, 5nd. Volt. AN di 3nd, att. al p dell'AN precedente, 3nd - 2p separati da 3nd - 3nd. Ch. e Volt. AR di 7nd. Volt. AN di 5nd, att. all'ultimo p dell'AN precedente, 5nd. Ch. e Volt. Con la seconda navetta lavorate un NG come spiegato in precedenza. AR di 7nd, att. al p centrale del secondo AN. AR di 5nd - 1p - 5nd, att. alla bse del primo AN. Volt. AR di 5nd - 1p - 5nd. Lavorate allo stesso modo altri cinque petali, poi fate un AR di 3nd - 1p - 3nd e iniziate il primo petalo degli ultimi cinque. Con la seconda navetta lavorate un AN di 6nd - 1p - 6nd. Ch. e Volt. AR di 4nd, att. al p dell'AR precedente, 4nd. Volt. AN di 2nd, att. al p dell'AN precedente, 2nd - 2p separati da 2nd, 2nd. Ch. e Volt. AR di 6nd. Volt. AN di 4nd, att. all'ultimo p dell'AN precedente, 4nd. Ch. e Volt. Con la seconda navetta lavorate un NG come prima. AR di 6nd, att. al p centrale del secondo AN. AR di 4nd - 1p - 4nd, att. alla base del primo AN. Volt. AR di 3nd - 1p - 3nd. Lavorate altri quattro petali ricordando che l'ultimo AR è formatp da 8nd.
Per completare questo fiore lavorate una base come mostrato nello schema e preparate la parte centrale utilizzando filo giallo e perline dello stesso colore. Per fare la parte centrale è necessaria una sola navetta. Inserite 14 perline nel filo e iniziate lavorando un NG, fate scivolare una perlina accanto al NG e ripetete 1NG - 1 perlina - 1NG. Chiudete in cerchio unendo l'ultimo NG al primo. Ripetete 1NG - 1 perlina - 1NG, att. al cerchio. Ripetete questi passaggi fino ad esaurimento delle perline. Annodate e tagliate i fili. Potete cucire o incollare questa parte al fiore.

Ecru flower - tatting - pattern
Ring of 5ds - 3p separated by 5ds - 5ds. Close and RW. Chain of 8ds. RW. Ring of 3ds, join to the last p of the previous ring, 3ds - 2p separated by 3ds - 3ds. Close and RW. Chain of 6ds. RW. Ring of 2ds, join to the last p of the previous ring, 2ds - 1p - 4ds. Close and RW. Chain of 4ds - 1p - 4ds, join to the central p of the ring. Chain of 6ds, join to the next p of the next ring. Chain of 4ds - 1p - 4ds, join to the central p of the next ring. RW. Chain of 4ds - 1p - 4ds. With the second shuttle begin the first ring of the second petal processed as before. When you tat the next chain, join it to the chain of the previous petal.
Make five petals in the same way, remember that the last chain is made of 8ds.
Ecru flower - tatting - pattern
Base
To complete the flower make its base following this pattern. To make the stamens I used metal wire size 0,50 mm. Insert a bead in each of three strands and wind the end around a pin.

AN di 5nd - 3p separati da 5nd - 5nd. Ch. e Volt. AR di 8nd. Volt. AN di 3nd, att. all'ultimo p dell'AN precedente, 3nd - 2p separati da 3nd - 3nd. Ch. e Volt. AR di 6nd. Volt. AN di 2nd, att. all'ultimo p dell'AN precedente, 2nd - 1p - 4nd. Ch. e Volt. AR di 4nd - 1p - 4nd, att. al p centrale dell'AN. AR di 6nd, att. al p centrale dell'AN successivo. AR di 4nd - 1p - 4nd, att. al p centrale dell'AN successivo. Volt. AR di 4nd - 1p - 4nd. Con la seconda navetta iniziate il primo AN del secondo petalo da eseguire allo stesso modo di quello appena descritto. Quando lavorate l'AR successivo, att. all'AR del petalo precedente.
Lavorate in tutto cinque petali allo stesso modo, ricordando che l'ultimo AR è formato da 8nd. Per completare il fiore realizzate la sua base seguendo lo schema sopra riportato.
Per fare gli stami ho usato del filo metalico (diametro 0,50 mm). Inserite una perlina in ciascuno dei tre pezzetti di filo e attorcigliatene l'estremità intorno ad uno spillo.

mercoledì 9 marzo 2016

3D Tatting flowers

Good morning everybody,
one of my friends asked me the patterns of my 3D tatting flowers, this post is for her.
white flower - tatting

Today we begin with the first flower, in the next post we'll see the others.

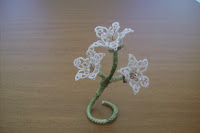
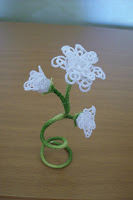
This work is composed of a big flower and two small flowers and is made with Perlè nr. 8.
To make the stem I used metal wire size 1 mm and paper adhesive tape to cover it before using the thread Perlè to complete the work.

 Below you'll find pattern and instructions to tat this flower.


Buongiorno a tutti,
una mia amica mi ha chiesto gli schemi dei miei fiori a chiacchierino, questo post è per lei.
Oggi iniziamo con il primo fione, nel prossimo post vedremo gli altri.
Questo lavoro si compone di un fiore grande e due piccoli ed è realizzato con Perlè nr. 8.
Per fare lo stelo ho impiegato filo metallico (diametro 1 mm) e nastro adesivo di carta per rivestirlo prima di usare il filo Perlè per completare il lavoro.
Di seguito troverete schema e istruzioni per realizzare questo fiore.


big white flower - tatting
Ring of 4ds - 3p separated by 4ds - 4ds. Close and RW (Reverse Work). Chain of 8ds. RW. Ring of 3ds, join to the last p of the previous ring, 3ds - 2p separated by 3 ds - 3ds. Close and RW.  Chain of 6ds. RW. Ring of 3ds. join to the last p of the previous ring, 3ds - 1p - 6ds. RW. Chain of 12ds, join to the central p of the ring. Chain of 6ds, join to the central p of the next ring. Chain of 4ds - 1p - 4ds, join to the central p of the third ting. RW. Chain of 4ds - 1p - 4ds.With the second shuttle make the first ring of the second petal. When you tat the next chain join it to the last chain of the previous petal and contine as before until end of the petal. Repeat this petal other three times.
After the fifth petal, tat a chain of 3ds - 1p - 3ds and begin the first petal of the next five. With the second shuttle make a ring of 3ds - 3p separated by 3ds - 3ds. Close and RW. Chain of 3ds, join to the p of the previous chain, 3ds. RW. Ring of 3ds, join to the last p of the previous ring, 3ds - 2p separated by 3ds - 3ds. Close and RW. Chain of 5ds. RW. Ring of 2ds, join to the last p to the previous ring, 2ds - 1p - 4ds. Close and RW. Chain of 8ds, join to the central p of the ring. Chain of 5ds, join to the central p of the next ring. Chain of 3ds - 1p - 3ds, join to the central p of the last ring. RW. Chain of 3ds - 1p - 3ds. With the second shuttle begin the next petal and repeat it other three times.
After ten petals tat the last three small petals in this way:
ring of 3ds - 3p separated by 3ds, 3ds. Close and RW. Chain of 3ds - 1p - 3ds. RW. Ring of 2ds, join to the last p of the previous ring, 2ds - 1p - 4ds. Close and RW. Chain of 8ds, join to the central p of the ring. Chain of 3ds - 1p - 3ds, join to the central p of the next ring. RW. Chain of 3ds - 1p - 3ds. Repeat this petal other two times. Cut leaving a long end and tie.

AN di 4nd - 3p separati da 4nd. Ch. e Volt. (chiudere e voltare). AR di 8nd. Volt. AN di 3nd, att. all'ultimo p del precedente AN, 3nd -  2p separati da 3nd - 3nd. Ch. e Volt. AR di 6nd. Volt. AN di 3nd, att. all'ultimo p del precedente AN, 3nd - 1p - 6nd. Volt. AR di 12nd, att. al p centrale dell'AN. AR di 6nd, att. al p centrale dell'AN successivo. AR di 4nd - 1p - 4nd, att. al p centrale del terzo AN. Volt. AR di 4nd - 1p - 4nd. Con la seconda navetta lavorate il primo AN del secondo petalo. Durante l'esecuzione dell'AR successivo, unitelo all'ultimo AR del petalo precedente e continuate la lavorazione come prima fino al completamento del petato. Ripetete questo petalo altre tre volte.
Dopo il quinto petalo lavorate un AR di 3nd - 1p - 3nd e iniziate il  primo petalo dei cinque successivi. Con la seconda navetta lavorate un AN di 3nd - 3p separati da 3nd - 3nd. Ch. e Volt. AR di 3nd, att. al p dell'AR precedente, 3nd. Volt. AN di 3nd, att. all'ultimo p dell'AN precedente, 3nd - 2p separati da 3nd - 3nd. Ch. e Volt. AR di 5nd. Volt. AN di 2nd, att. all'ultimo p dell'AN precedente, 2nd - 1p - 4nd. Ch. e Volt. AR di 8nd, att. al p centrale dell'AN. AR di 5nd, att. al p centrale dell'AN successivo. AR di 3nd - 1p - 3nd, att. al p centrale dell'ultimo AN. Volt. AR di 3nd - 1p - 3nd. Con la seconda navetta iniziate il petalo successivo e ripetetelo altre tre volte.
Dopo dieci petali lavorate gli ultimi tre petali piccoli in questo modo:
AN di 3nd - 3p separati da 3nd - 3nd. Ch. e Volt. AR di 3nd - 1p - 3nd. Volt. AN di 2nd, att. all'ultimo p dell'AN precedente, 2nd - 1p - 4nd. Ch. e Volt. AR di 8nd, att. al p centrale dell'AN. AR di 3nd - 1p - 3nd, att. al p centrale dell'AN successivo. Volt. AR di 3nd - 1p - 3nd. Ripetete questo petalo altre due volte. Tagliate i fili lasciando una delle estremità più lunga, e annodate.

white flower - tatting
Pass the long end through the down picots and pull to wrap the petals. Tie.

Passate l'estremità più lunga attraverso i picot in basso e tirate per avvolgere i petali. Annodate i fili.


metal wire - tatting flower
Bend metal wire size 0,50 mm and insert it into the center of the flower, then wrap it around the threads.
Shape the petals with the fingers to give flower form.

If you prefer you can skip this step and sew the flower on what you want to decorate. 

white flower - tatting
Piegate un po' di filo metallico (diametro 0,50 mm) e inseritelo al centro del fiore, poi avvolgetelo intorno ai fili.
Modellate i petali con le dita per dargli la forma del fiore.

Se lo preferite potete saltare questo passaggio e cucire il fiore su ciò che volete decorare.


white flower - tatting - pattern
The small flowers are made in the same way, starting from the sixth to the thirteenth petal.
After last petal, continue with a chain of 3ds - 1p - 3ds. RW.
Ring of 2ds, join to the p of the previous chain, 4ds - 1p - 2ds. Close and RW.
Chain of 2ds - 1p - 2ds. RW. Ring of 2ds, join to the p of the previous ring, 4ds - 1p - 2ds. Close and RW. Chain of 2ds - 1p - 2ds.
Ring of 2ds, join to the p of the previous ring, 6ds. Close. Cut and tie.

I fiori piccoli sono lavorati allo stesso modo, partendo dal sesto petalo fino al tredicesimo.
Dopo l'ultimo petalo continuare con un AR di 3nd - 1p - 3nd. Volt.
AN di 2ds, att. al p dell'AR precedente, 4nd - 1p - 2nd. Ch. e Volt.
AR di 2nd - 1p - 2nd. Volt. AN di 2nd, att. al p delL'AN precedente, 4nd - 1p - 2nd. Ch. e Volt. AR di 2nd - 1p - 2nd. AN di 2nd, att. al p dell'AN precedente, 6nd. Ch., tagliare e annodare i fili.

white flower - tatting

To complete the flowers make the bases (1 big base and 2 small bases). Below you find the pattern.

Per completare i fiori lavorate le basi (1 piccola e due grandi).
Di seguito trovate lo schema.
white flower - tatting - pattern
At last follow the steps shown in these photos to obtain the complete flower.

Infine seguite i passaggi mostrati in queste foto per ottenere il fiore completo.

white flower - tatting